In this tutorial, we will be making a HUD (Heads-up display) that can be use for most games that has a player with life.

Tip: If you can’t see the images below properly, Click and zoom on it.
Things that you can learn in this tutorial:
- Basics of Adobe Illustrator
- Manipulating Shapes
- Creating Frames for player life Animation
Lets get started!
Step 01:
Preparing our workspace
Create a new document with a 96×32 size. You can name it “HUD – Player health”

We are gonna draw 3 hearts that will represent 3 lives of a player. each heart will have about 32 pixels width and height, so thats why we need a document with a 96×32 size.
Next thing we need to do is to create a 32×32 grid. Go to Edit > Preference > Guides and Grids.
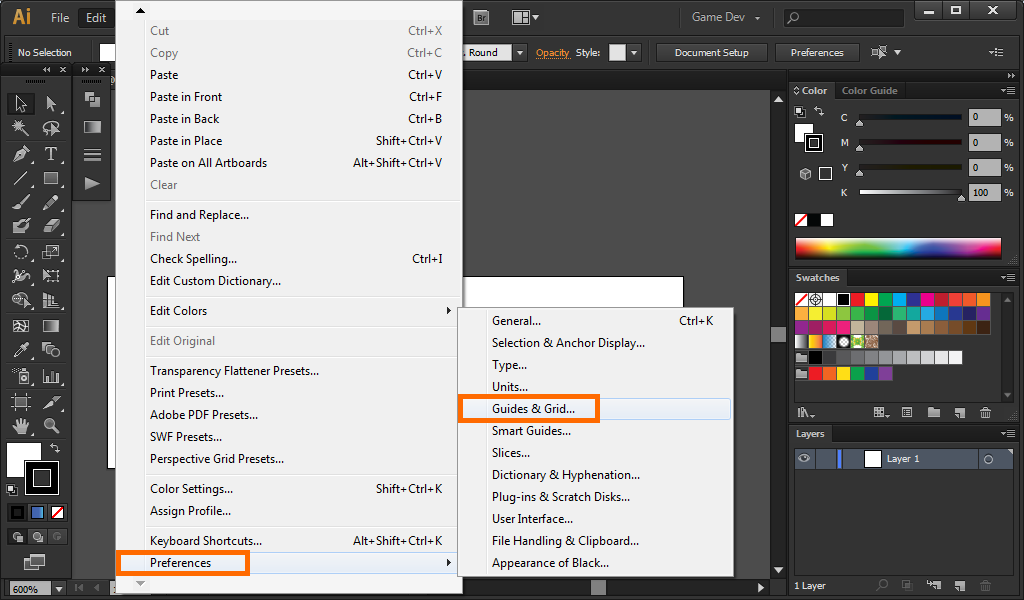
Then put “32” in the gideline every box and “1” on the subdivisions. Then click Ok

In this way we will have a 32×32 grid.
Tip: Press ctrl + ” or click View > show grid to show the grid.
Step 02:
Starting our heart shape
Using the eclipse tool, draw a perfect circle (Hold Shift to draw a perfect circle) that is like 1/4 of our first 32×32 box as shown below.

Drag the lowest anchor point below, Drag it about 7px far.

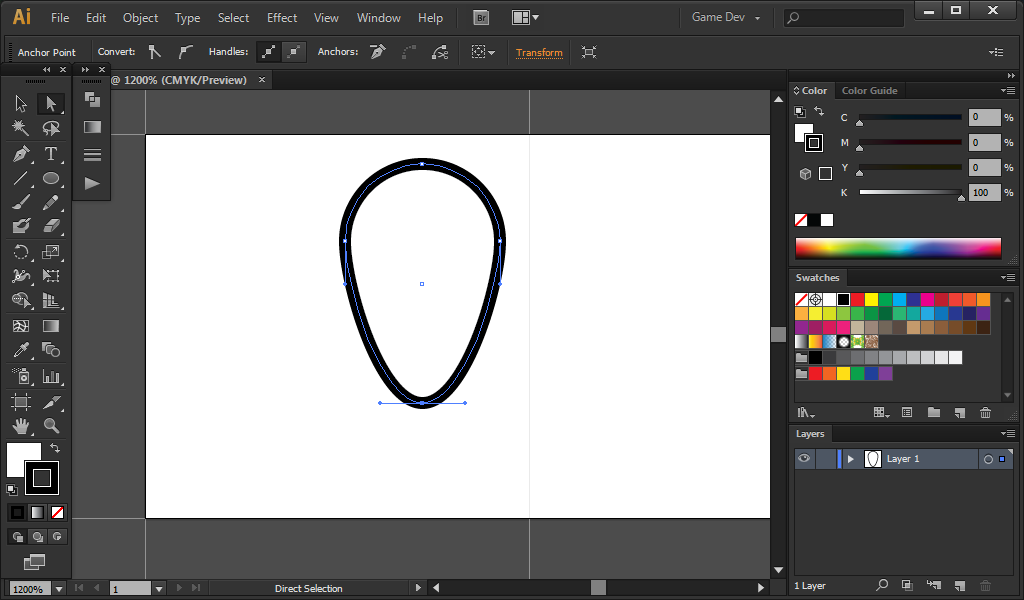
After Bending, rotate the object by -30 degrees. (Right-click > Transform > rotate)

Click “OK” and now we have the half of the heart…. Now go save before going to the next step!
Step 03:
Finishing our heart shape
Now we need to finish the other side of the heart, and the best way to do it? Of course its best to copy the finished side.
Copy the finished side and paste it on the same position (Press ctrl + c to copy and then ctrl + f to paste it on the same position)
Now when you look at your layer, you will notice that you now have 2 similar objects.
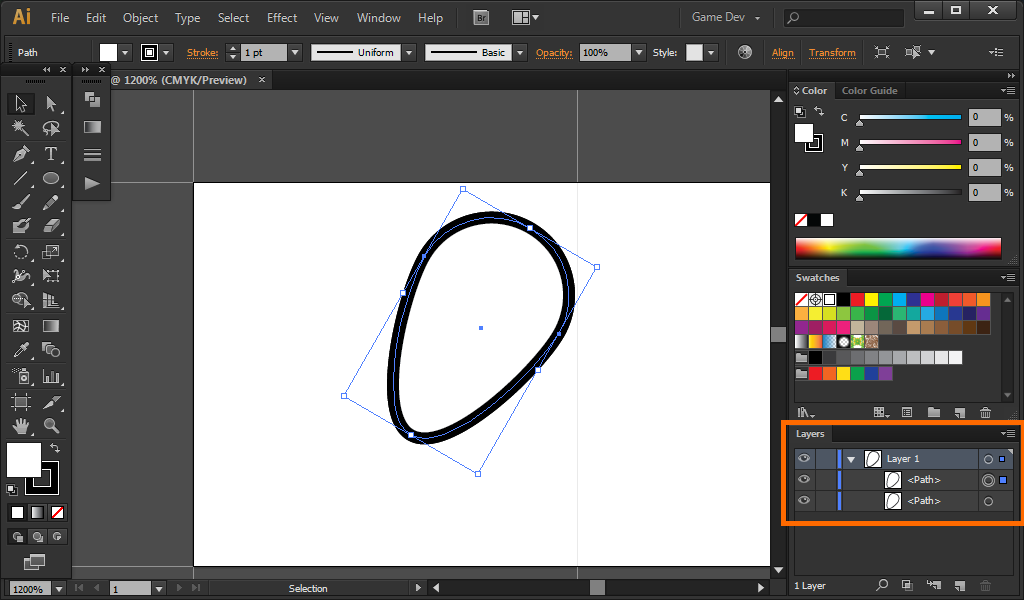
We then need to rotate the other one to 60 degrees, that will flip it to the other side.
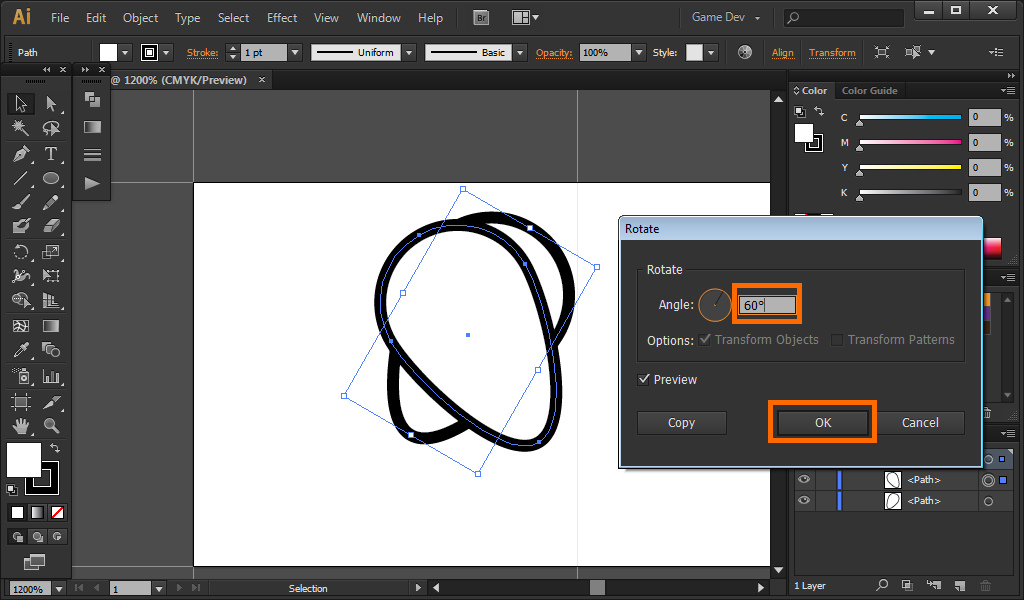
Now drag the 60 degree Object towards the left side, while carefully putting the lower part together with the other side.
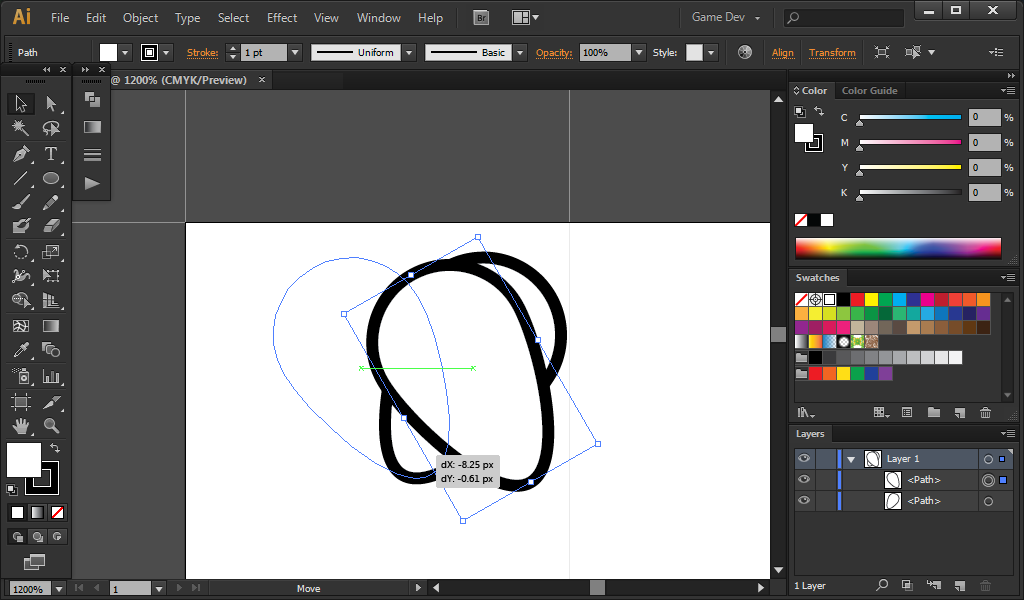
This could take a while to be perfected, you did it correctly if the result is the same below.
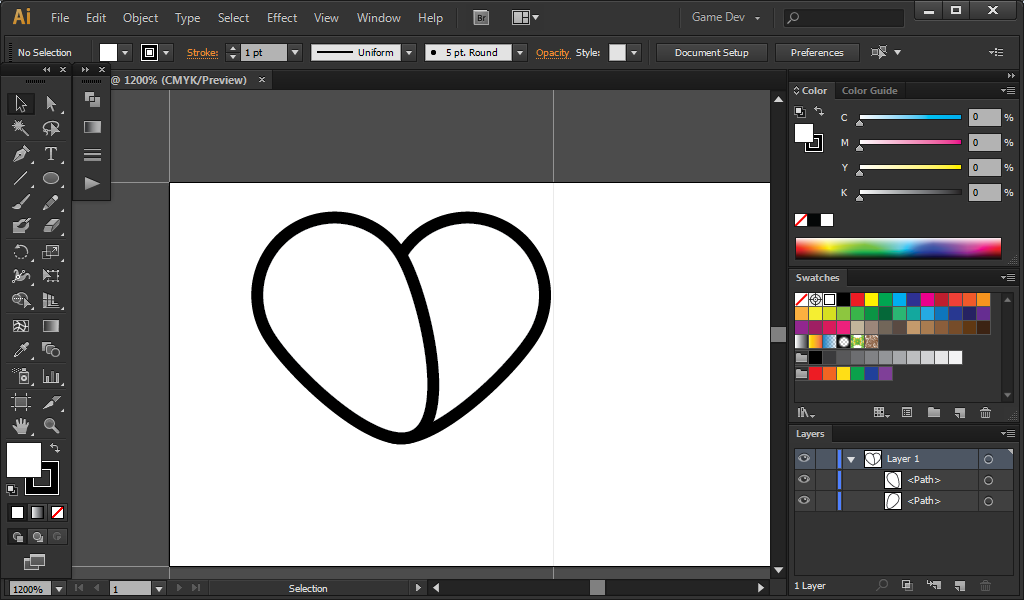
After that, Selecte the 2 objects and unite them. (Pathfinder > Unite)


Tada~! you now have a heart shape ready to be colored. Save first before you go to the next step.
Step 04:
Coloring
Now we need to color this heart object, I pick a dark red color on my default swatch. Leaving the stroke black will not make a good blending so I change it to the same dark red but with a lower brightness (20)
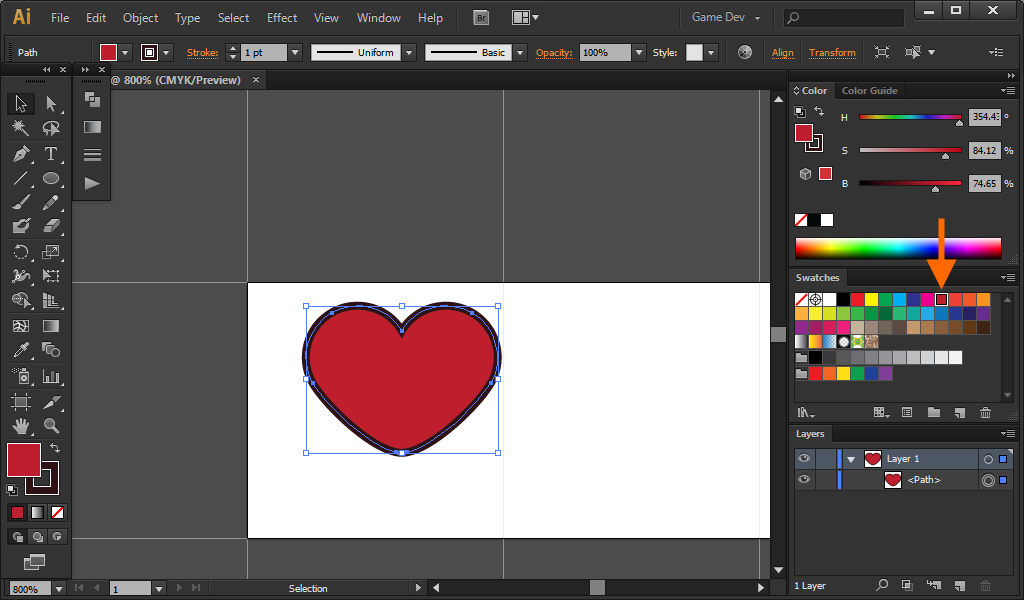
Now that we have the object colored, lets look at it at 100% (Ctrl + 1)
It looks like it’s stroke is too thin, lets try to to make it’s stroke from 1 to 2.

Now it looks better with a thicker stroke.
Step 05:
Light Effect
To enhance our HUD and make it better, We will put some light effect to it.
First draw a line in the upper right corner of the heart using the line segment tool (\)

Convert the upper anchor to a smooth corner, so we can bend it.
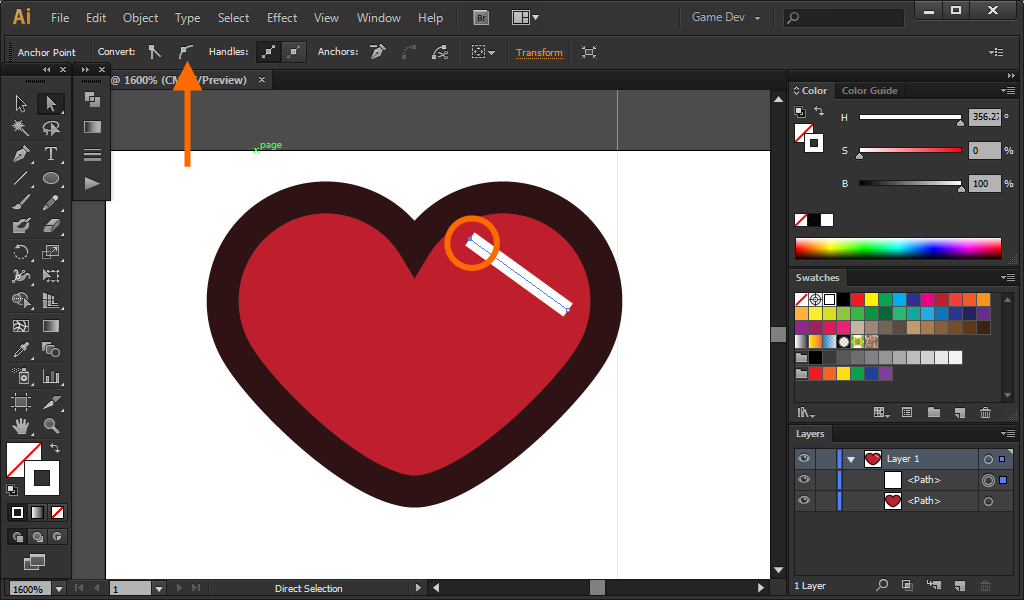
After converting, Drag one of its anchor and bend it as shown below

After Releasing the anchor, It seems that both end of the line is a bit awkward for a light effect, so that’s why we need to edit it by choosing a width profile
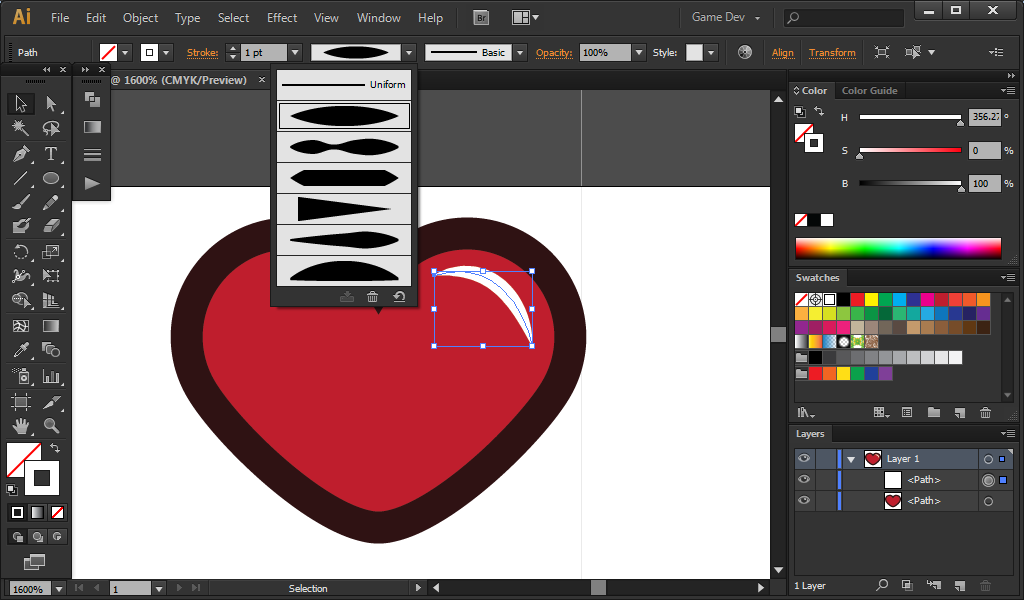
I choose the first one, Try to experiment with the other width profiles if you want.
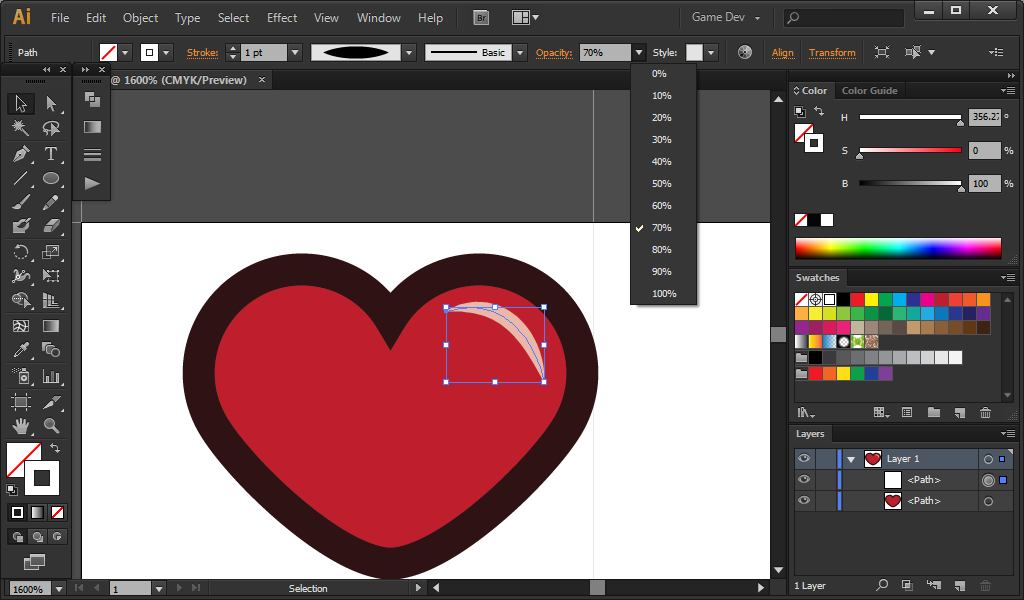
Also, Editing the Light effect’s oppacity could result in a better blending with the heart object. I edit mine to 70% oppacity
Thats all in making a heart for the player’s life. be sure to save your work before going to the last step of this tutorial.
Step 06:
Making different frames for animation
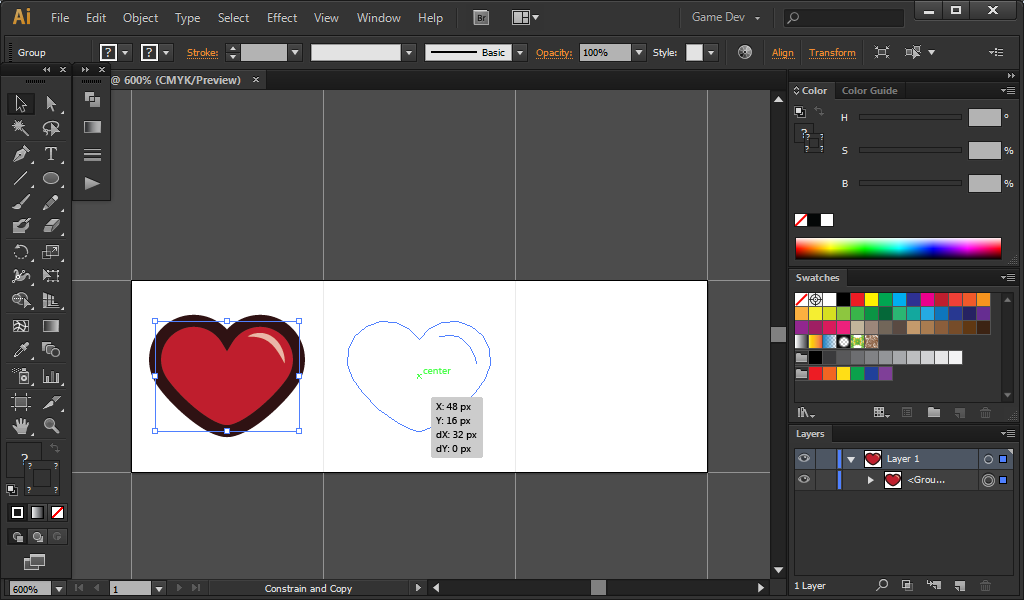
If you’re heart object is not in the middle of the 32×32 grid, its now the time to reposition it. Select all the objects and group them (Ctrl + G) to easily move them all together.

If you’re Happy with the position of your heart object, Save it as “PlayerLife_1left” or anything that you’d like.
After you save it, Drag the whole heart to the right while holding (Ctrl) and (Alt). Holding Ctrl will make your drag easily and holding Alt will duplicate the heart.

If you done it successfully, save it again using another name like “PlayerLife_2Left”
Do this again for the 3rd Life.

And save it again with another name like “PlayerLife_3Left”
Congratualitons! After doing those steps, you now have 3 frames for a player’s life HUD. If you need more than 3 lives, then just expand your workspace and copy the hearts. If you have any questions, comments or suggestions, feel free to comment below or email me.
Follow me to received email updates about my latest posts and tutorials.

Nice tutorial. Keep them going!
Thanks!
Good stuff 😀
Do you make tutorials anymore?!??1
Not at the moment